
Boost Your SEO with Schema Markup
Have you hit the first page for a keyword, but are struggling to move up the rankings? Do you want an extra edge to not only bump you up, but also increase the traffic AND clicks through to your page? Of course you do! That’s why in this article I’m going to walk you through how to add Schema Markup to your blog content. What it is, why you need it, how to set it up and more…
So what is Schema Markup and how can it affect my rankings?
Search engines are only as smart as the information that we give them. We can write a page about a topic but they will only have a rough idea of what the page is about… That’s why we add in onpage SEO around a target keyword. It helps the bots to understand the page topic so that it can recommend your result when people search. The thing is, this can help it understand the content or words on the page, but it can still struggle with the context or meaning behind it.
For Example
Let’s say that you write an article and the target keyword and headline mentions ‘Avatar’.
Well is this page about:
- The James Cameron movie or its sequels?
- The Last airbender cartoon?
- Or an article about your Warcraft character?
That’s where structured data comes in. You can think of it like an extra on page SEO step. By adding in structured data, the search engines can then understand the meaning or ‘semantics’ behind the content on your page.
Why is this important?
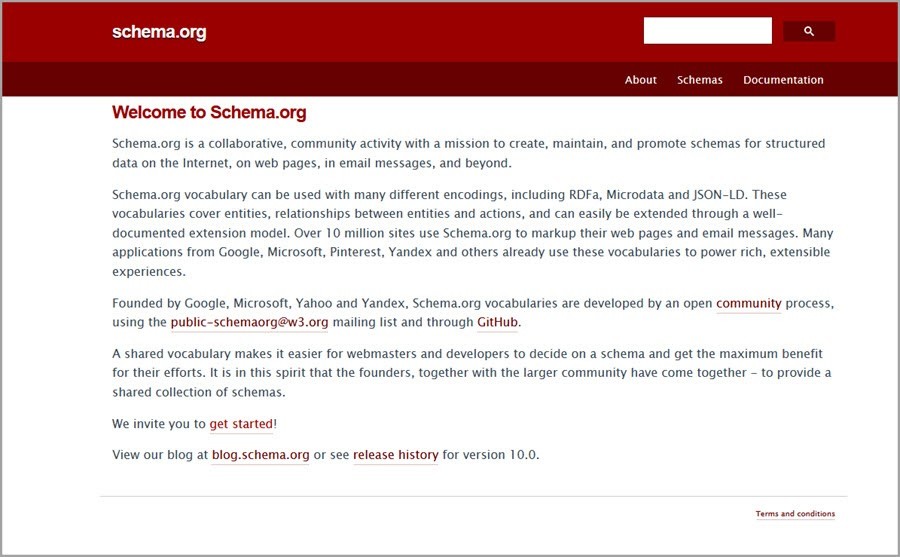
Because by doing this, search engines can offer the best possible option for someone’s query, and that’s what they care about. Why? Because a good experience means that users keep using their product. And so back in 2011, the 4 big search engines joined together to create Schema.org.
- Yahoo
- Microsoft Bing, and
- Yandex
Schema is their universal database of terms and codes to structure your content.
Now don’t be overwhelmed because I’m going to walk you step by step through an example in just a second.
So how does Schema help me get more traffic?
While Schema is not itself a ranking factor, it can actually affect your rankings and traffic.
How?
Rich Snippets…
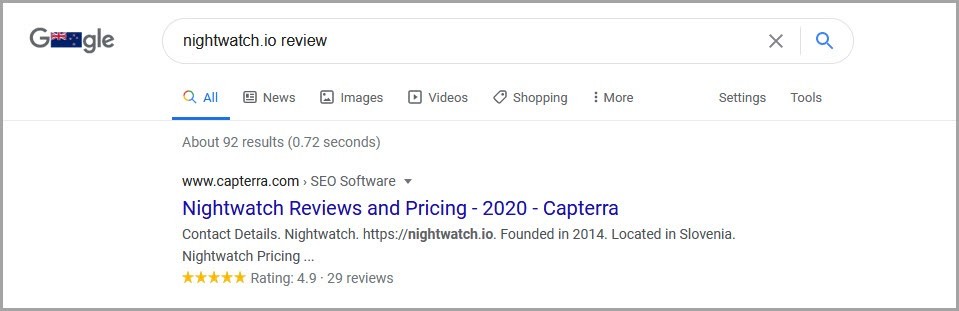
These are the results that show in ‘position zero’ at the very top of the page. They often break down a topic and go into more detail or feature more information than a regular serp result. Here you can see that Nightwatch has 4.9 stars and can click through to direct user reviews.
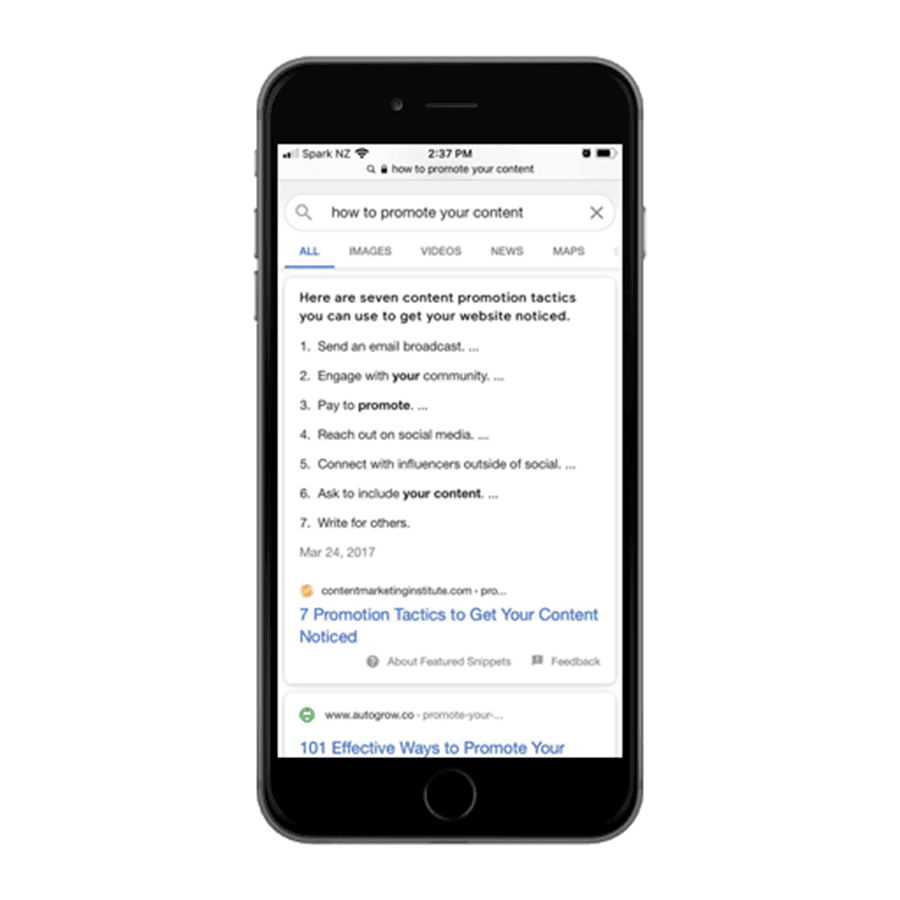
There are many different types of rich snippets. Informational ones can take up far more space on front page results, meaning a better chance of being clicked. (On mobile this will almost always take up the entire screen).
By adding in Schema Markup you actually improve your chances of being featured as a rich snippet, as search engines pull the snippet information from your structured data.
Want to know something really cool?
This can even help you jump up the first page results…
How?
Well you might be lower ranked on the page, but because you’ve been featured in the snippets, you jump to the top result instead!
Better still?
Even if you stay where you are in the SERPS, by having more appealing information about your topic and features in your result, this can help you to stand out and get more clicks.
For Example

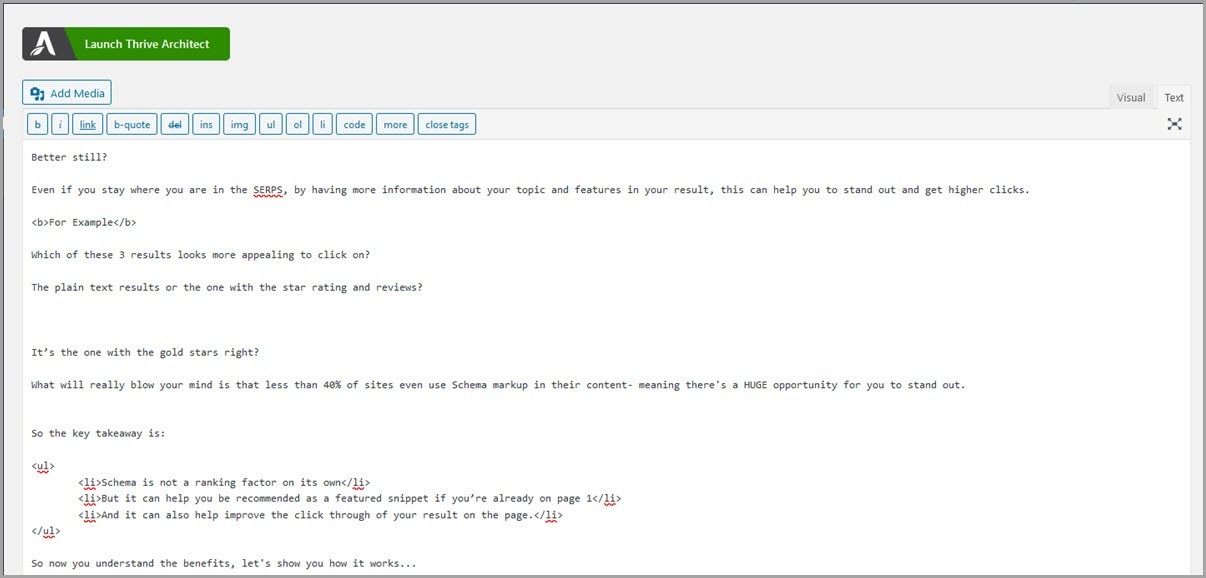
Which of these 3 results looks more appealing?
The plain text results or the one with the star rating and reviews?
It’s the one with the gold stars right.
Anything that you can do to improve the CTR of people seeing you in the SERPS will have a huge effect on your traffic.
What will really blow your mind is that less than 40% of sites even use Schema markup in their content, meaning there’s a HUGE opportunity for you to stand out.
So the key takeaways are:
- Schema is not a ranking factor on its own
- But it can help you be recommended as a featured snippet if you’re already on page 1
- And it can also help improve the click through of your result on the page.
So now you understand the benefits, let’s show you how it works…
So how do we add Schema to our content?
It’s very similar to the HTML code that you might have seen or used in Wordpress or other content management systems.
But rather than adding H1 tags to your headlines, it’s more about adding specific terms to help describe certain elements on a page:
- If its an article
- A review
- A recipe
- A product page
- A how to guide
- An FAQ etc
Here’s an example of ‘webpage’ schema.

You simply create the code that’s relevant to your article and its meaning, and then you add it into the header for that page. This way when search engines land on the page, they can understand and recommend it better.
Now Schema is a HUGE topic. Just like there are different types of onpage SEO for different industries, there are different Schema types for different sites and pages. Rather than go through all of them, I’m going to walk you through how to set up Schema for a blog post. This way you can help improve any pages that you’re ranking for with your content. So let’s dive in…
Schema Plugins, Tools and Overlays
I want to walk you through a few quick tools, the strengths and limitations of each and why you should use the one I recommend. (Side note: All of them are free!)
But first let me introduce you to the article that we’re going to add schema to, so you can see how it affects it.
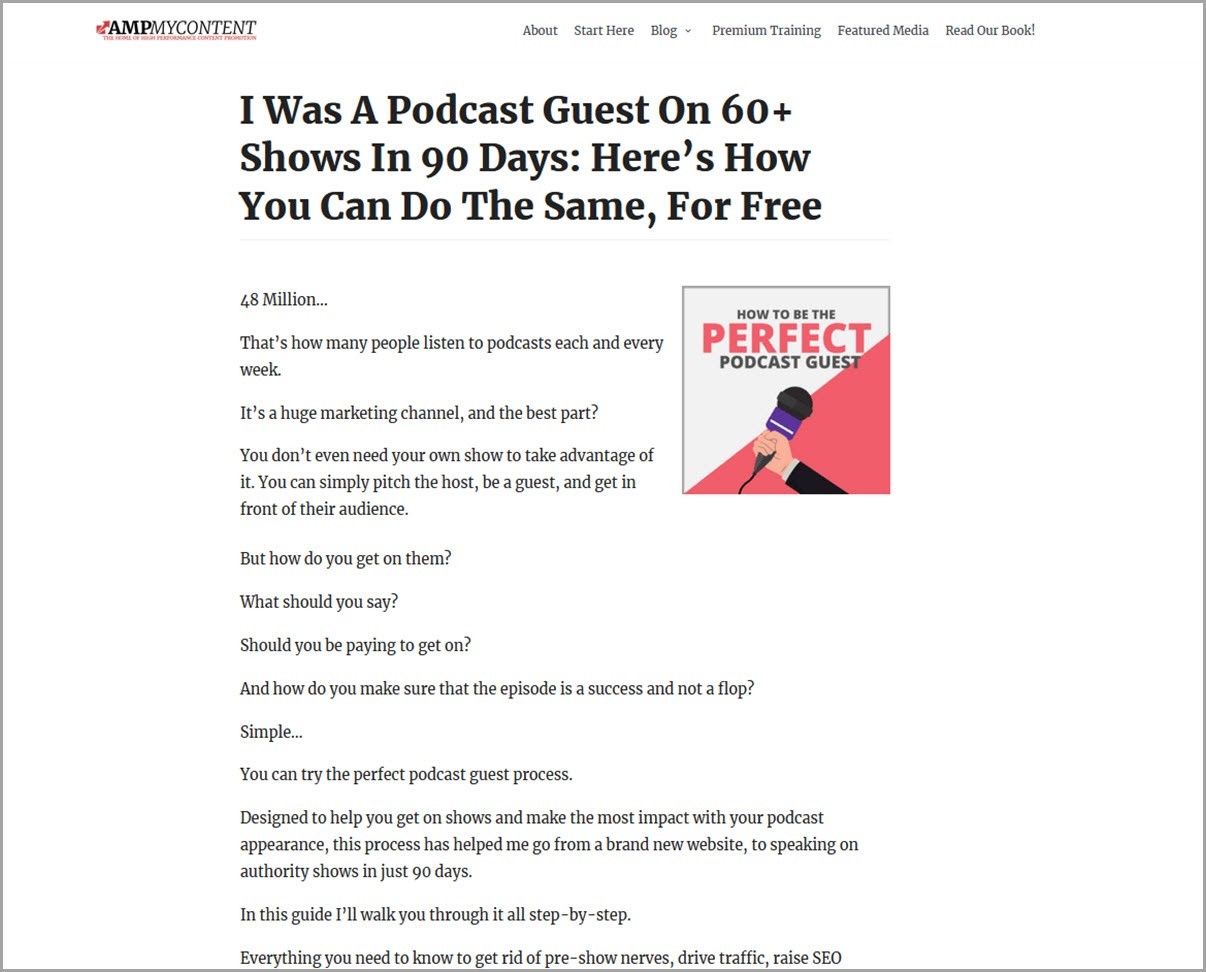
This is the most recent article on my website.
It’s a case study/how to guide of how we took a brand new site from DA zero to DA 40, all from just pitching podcasts and getting on shows. (Podcasts are fantastic for link building btw!)
Now this article has 3 types of Schema that we need to markup:
Schema #1: BlogPosting Schema
This is the basic information about the article.
- What it’s about.
- Who the author is,
- When it was published etc.
For this we just need some simple Blog Post Schema so that search engines understand it. Most plugins and tools will cover this but they don’t always cover the next 2 parts.
Schema #2: FAQ Schema
During the introduction and ‘inciting incident’ part of our article, we break down common questions about the topic.
Not only does this help get the reader more invested, but they often rank for long tail keywords or LSI terms.
By adding in the FAQ schema we can then have these questions and answers appear below our result in the SERPS, and help us to get more clicks.
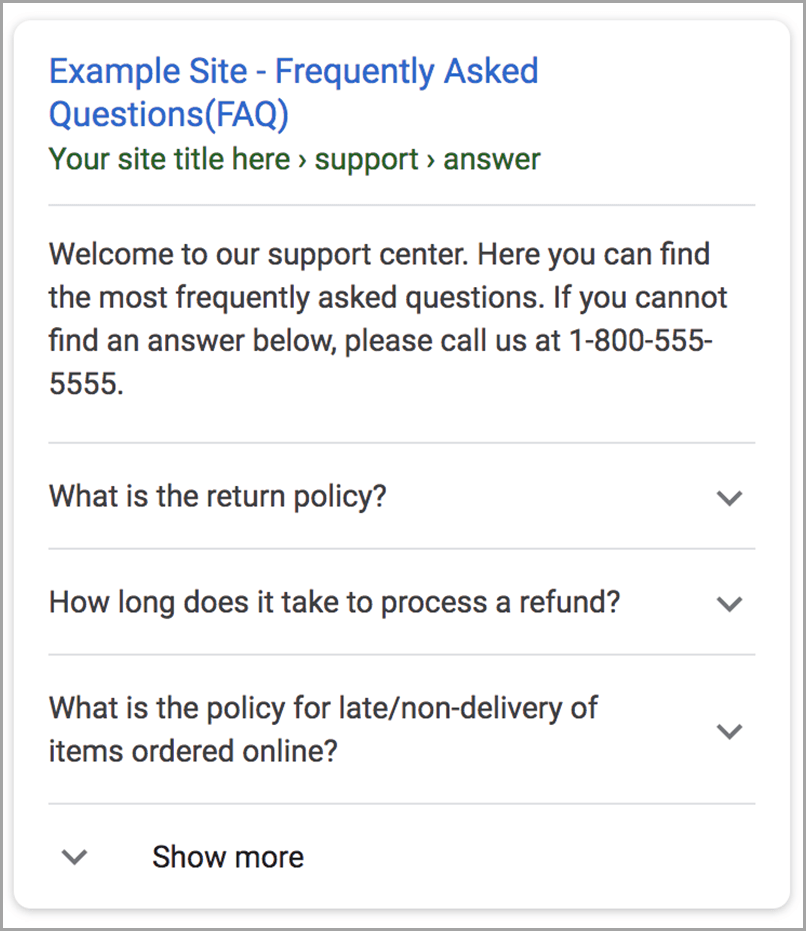
It helps us stand out and it gets the searcher consuming our content.
Because the topic is much larger than just a few questions you’ll often see them click through to read your guide.
Schema #3: How To Schema
The bulk of the post is actually breaking down step by step into how to find, filter, pitch and get onto podcasts.
Because of that we need to use ‘How To’ schema so that steps appear in the mobile search results.
Why care?
Not only is mobile search on the rise, but it also helps you stand out on mobile devices.
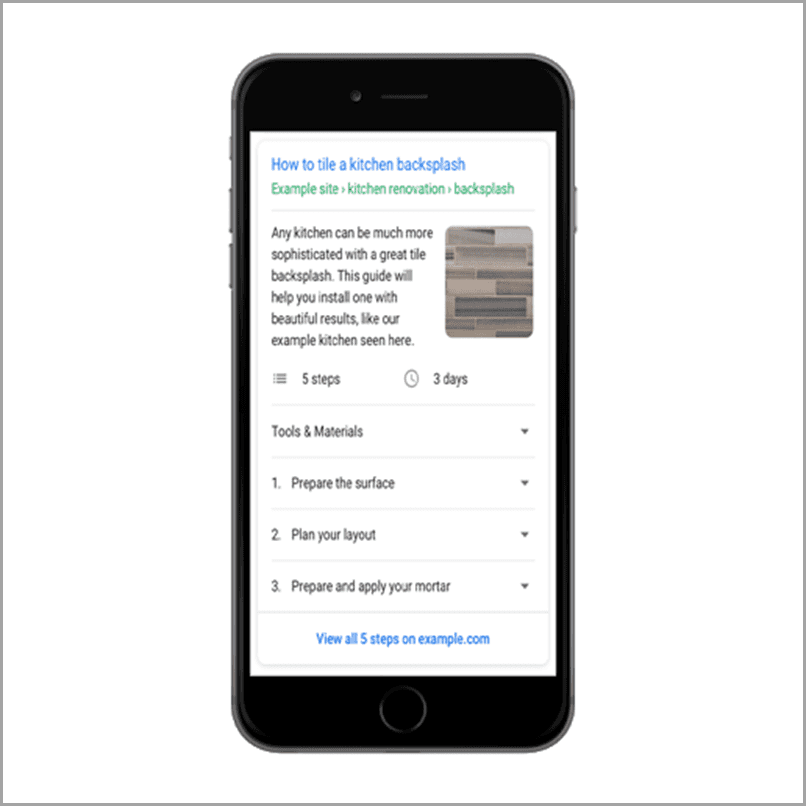
As you can see, it takes up the entire page. And by giving value up from right away like this, it can help to improve the click through from the results. Now like I said most tools don’t have all these features.
The Google Structured Markup Helper
Google has a free tool that allows you to add a few schema options via an overlay.
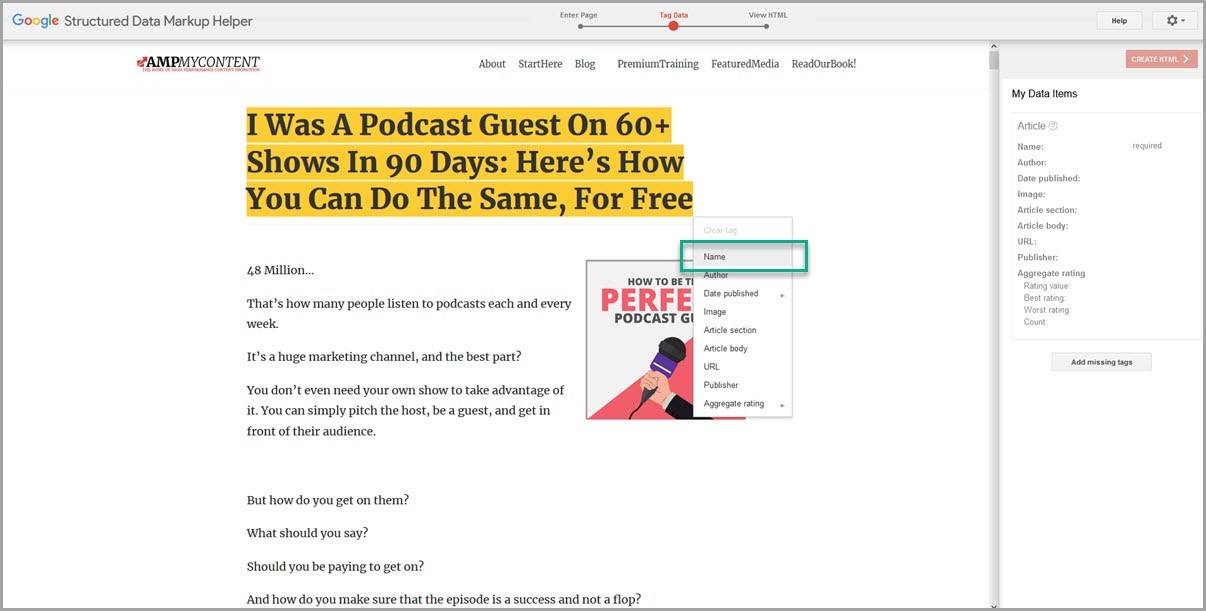
You simply load up the page, highlight the section, and then mark it up with the corresponding schema. Like I say though, the options are limited and you can only add in one core type for an article that might have multiple potential features.
Another tool is the Schema Builder Chrome extension.
This is another overlay tool that allows you to highlight and markup, but it has far more options.
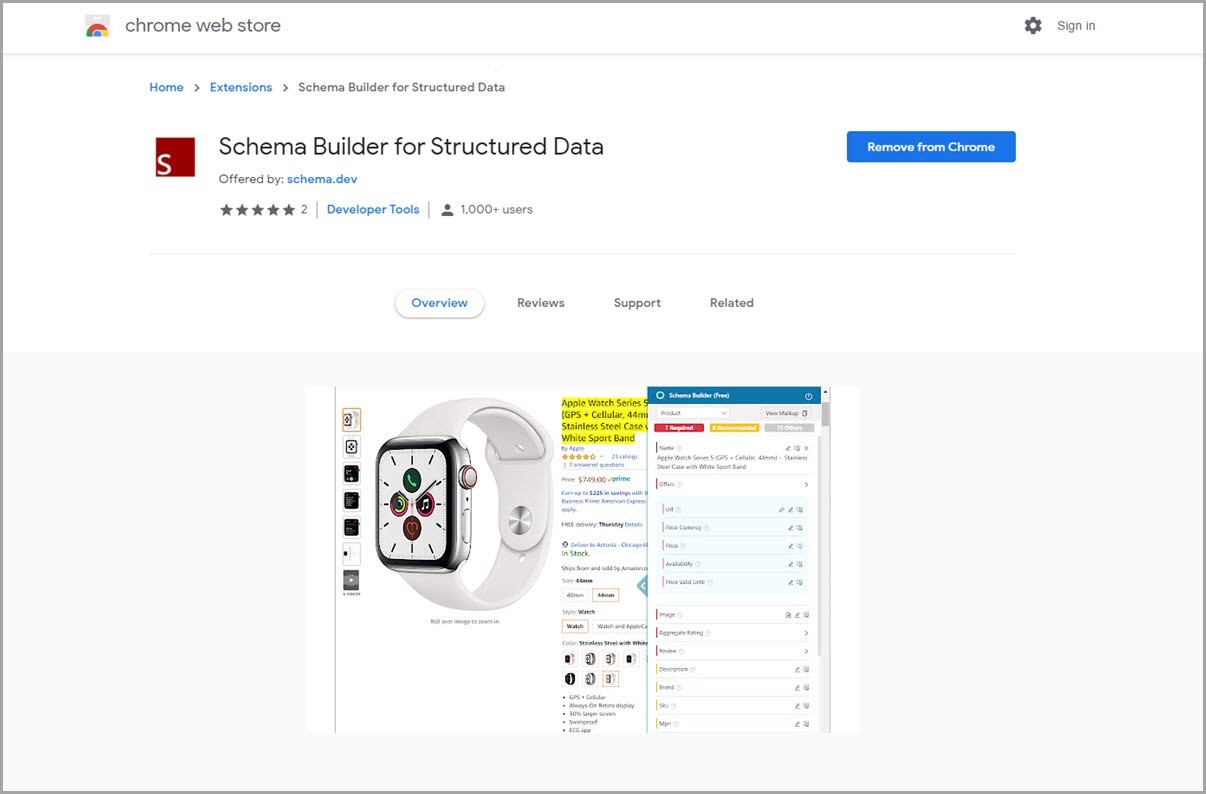
Unfortunately this kept freezing on me, but can be a great option when you can get it to work.
SEO Yoast Plugin
There are a number of plugins for Wordpress that can allow you to markup your content. One you might already be using is SEO Yoast.
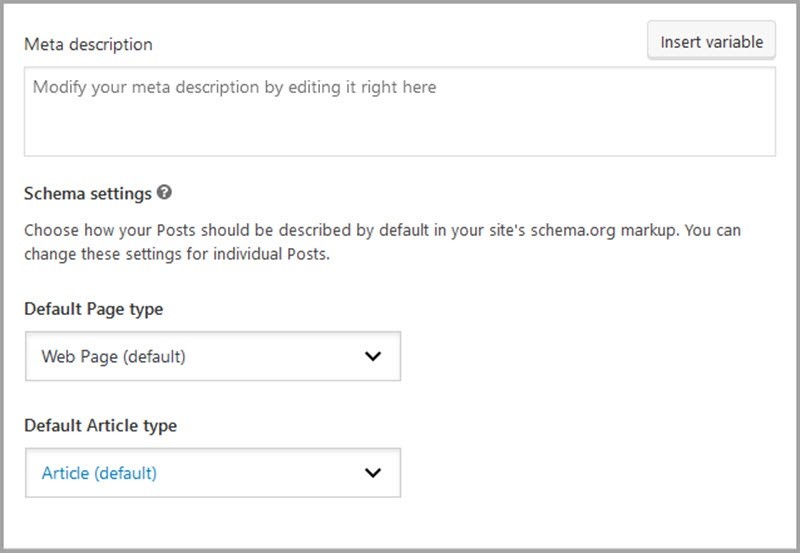
Traditionally an SEO plugin, it does have Schema markup options for your core site, along with an editor that can help you add how to and FAQ markup. The issue here is that it again only allows you to do basic Schema UNLESS you use their specific code builder and the new Gutenberg editor when creating your page. This code actually affects the design of the page so I’m not a huge fan.

Finally we have the winner…
Merkle Schema Markup Generator
This is a free tool and my favourite option.
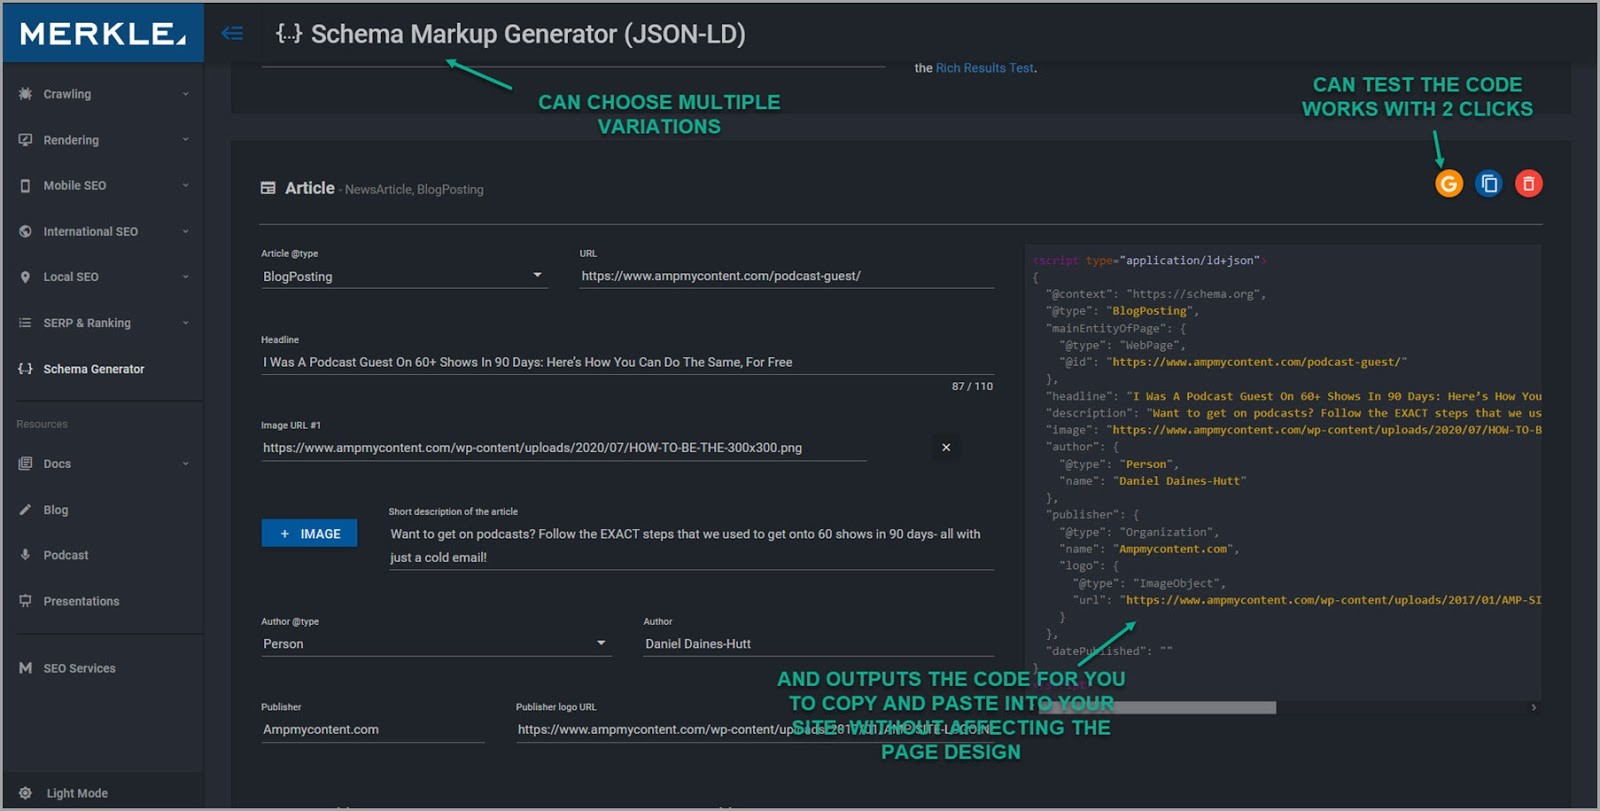
Not only does it allow you to enter the most Schema options, but it output’s the JSON-LD code that you need so can copy and paste into your site header. This way you don’t affect your article’s appearance when you add it to the page.
So let’s walk you through these 3 markup options for our article.
Step #1: Create the Schema Markup
We’re going to create each markup type that we need and then save them onto notepad before installing them all at once on our page.
So let’s start with the basic ‘blogpost’ article schema.
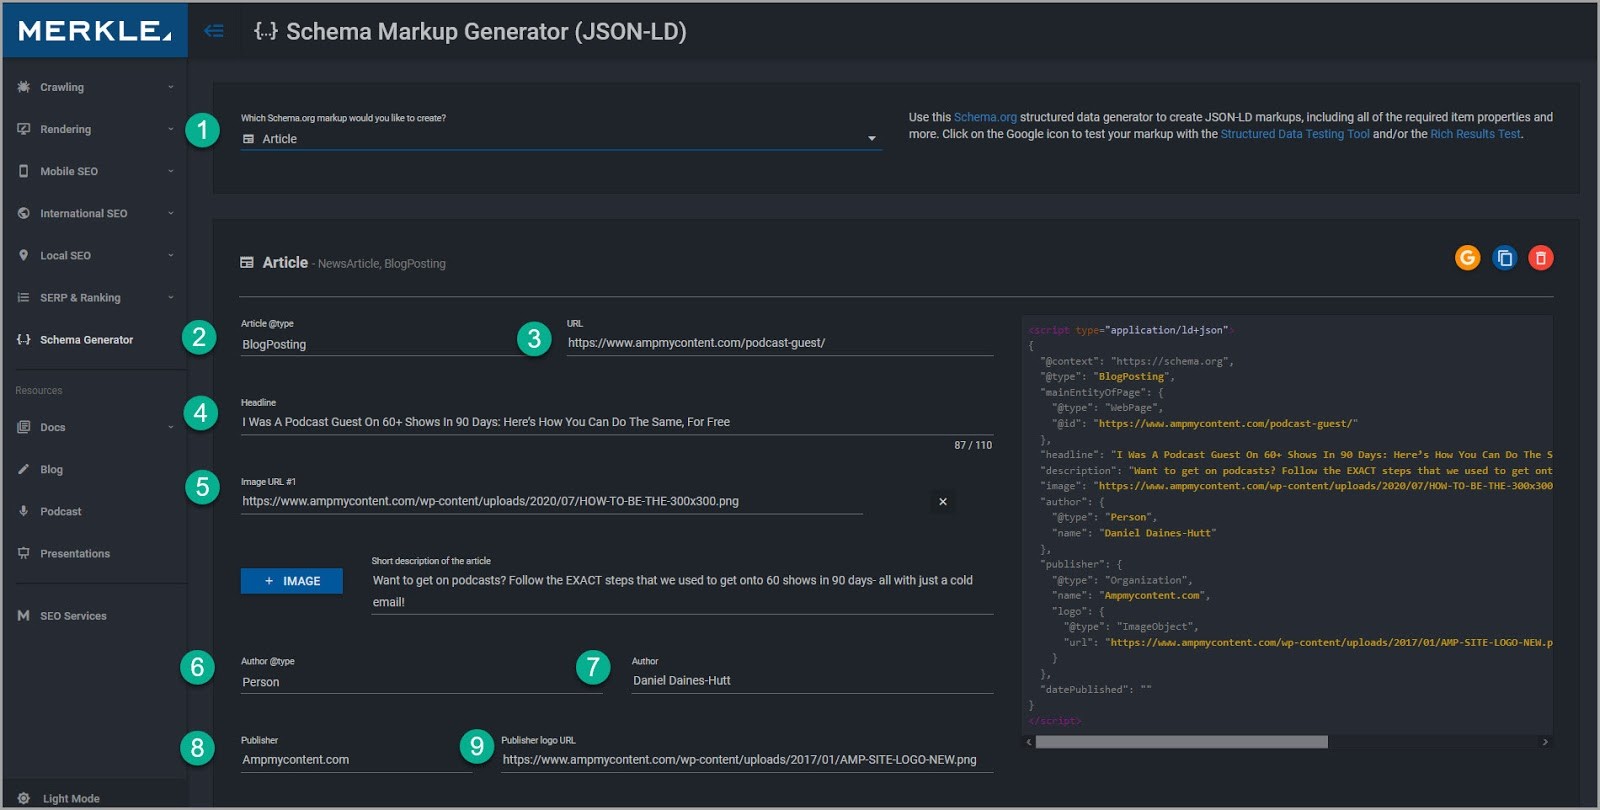
Go ahead and load up Merkle
- Set to article.
- Set article type to ‘blogposting’.
- Add the URL of your article.
- Add the headline.
- Add the Image URL (Copy the link location of the header image)
- Author type to person.
- Author name.
- Publish date.
- And date modified. (Just use today’s date)
Once you’ve created the code, you want to check that it’s working.
Go ahead and click the yellow G to test the code, and then this pop up menu will appear.
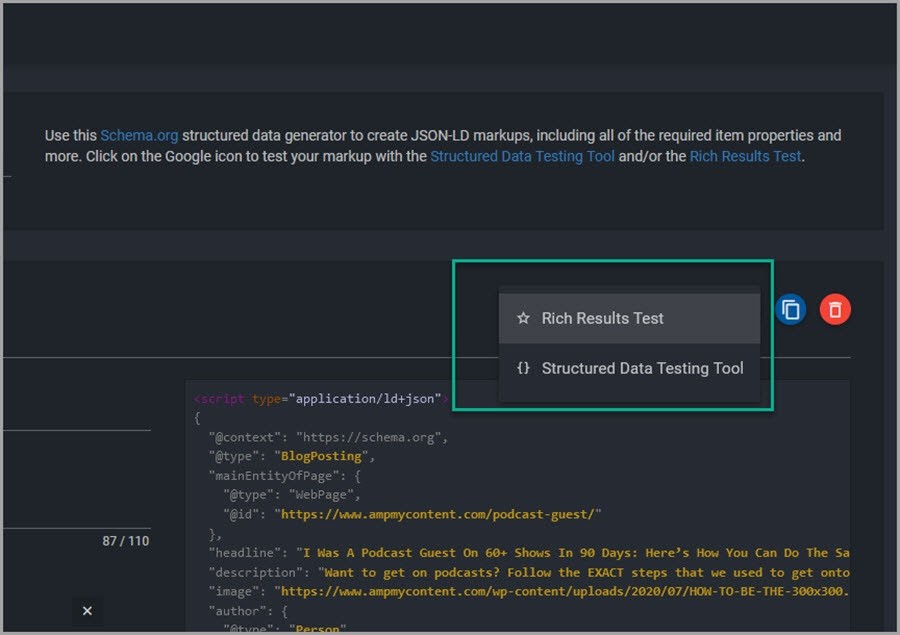
You need to test both the Rich Results and Structured Data for any errors. (Its ok to have warnings)
Click each to load them in new tabs and run the tests.
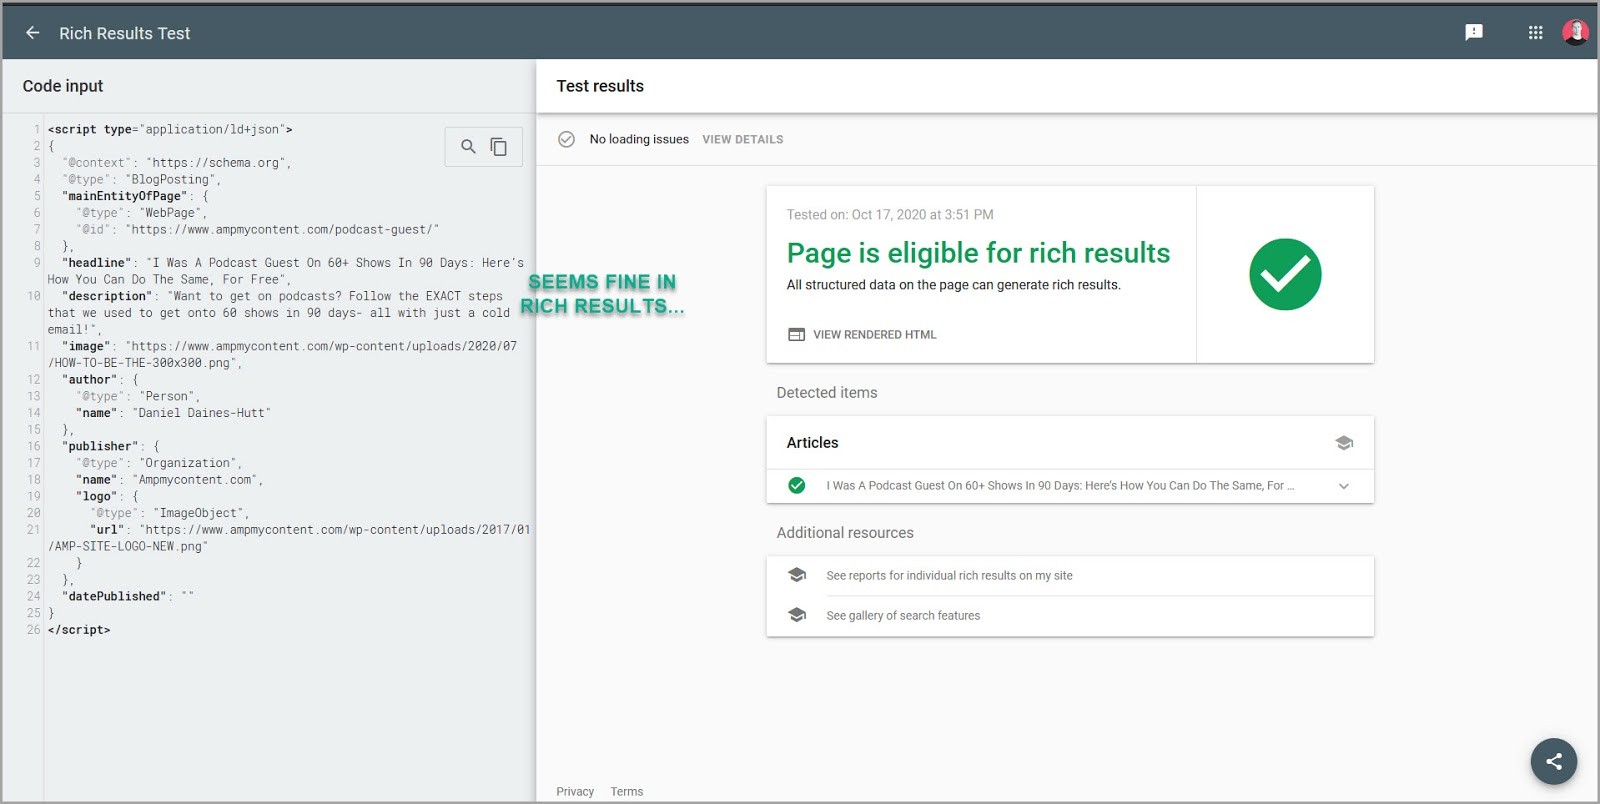
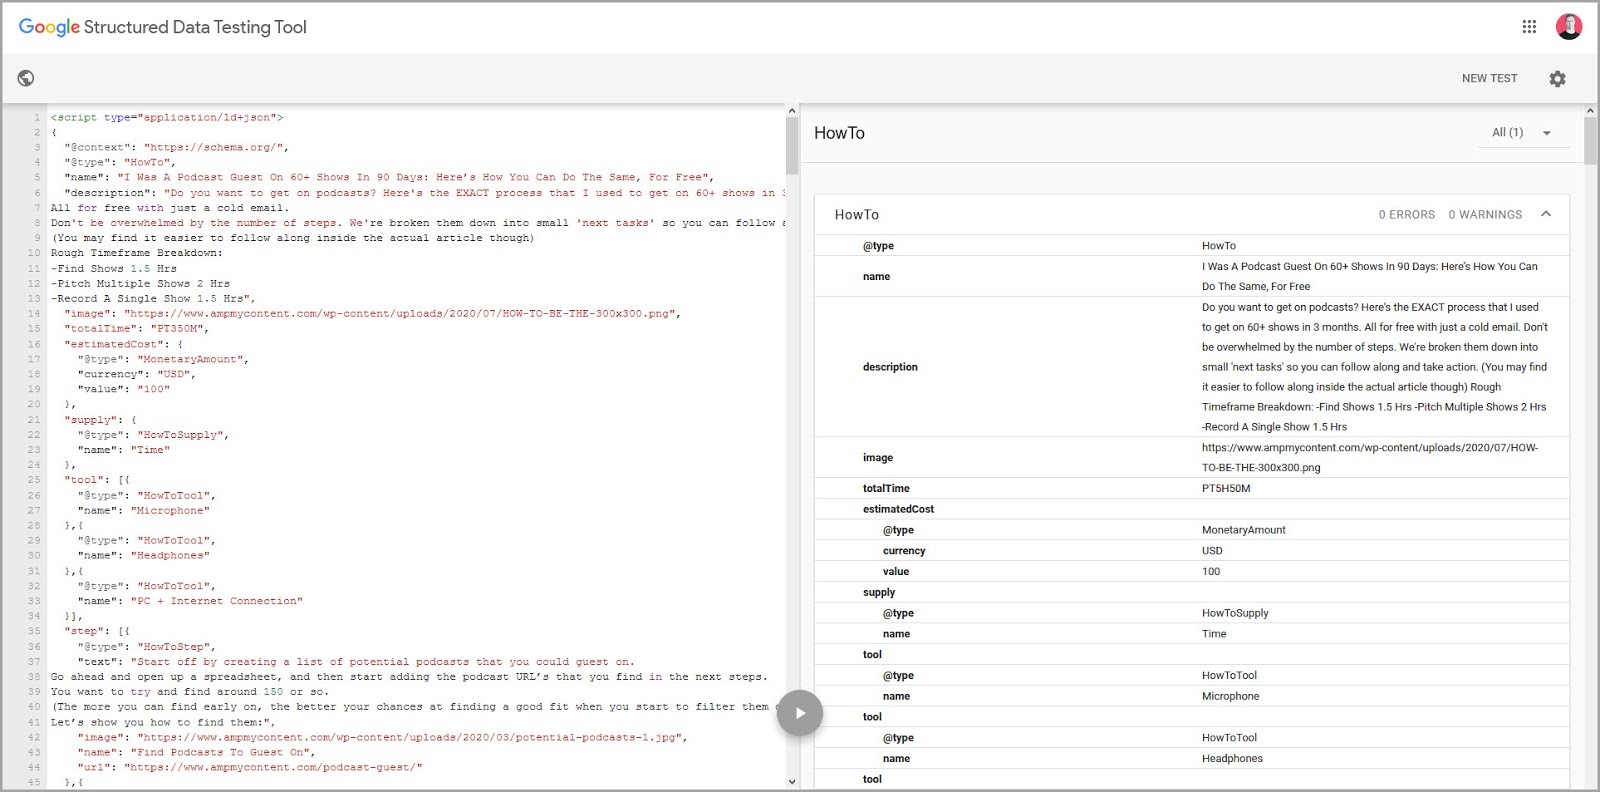
Here you can see the Rich Results test:
And here’s the structured data test.

As you can see, we actually had a warning on this code, as we forgot to fill in the date published information.
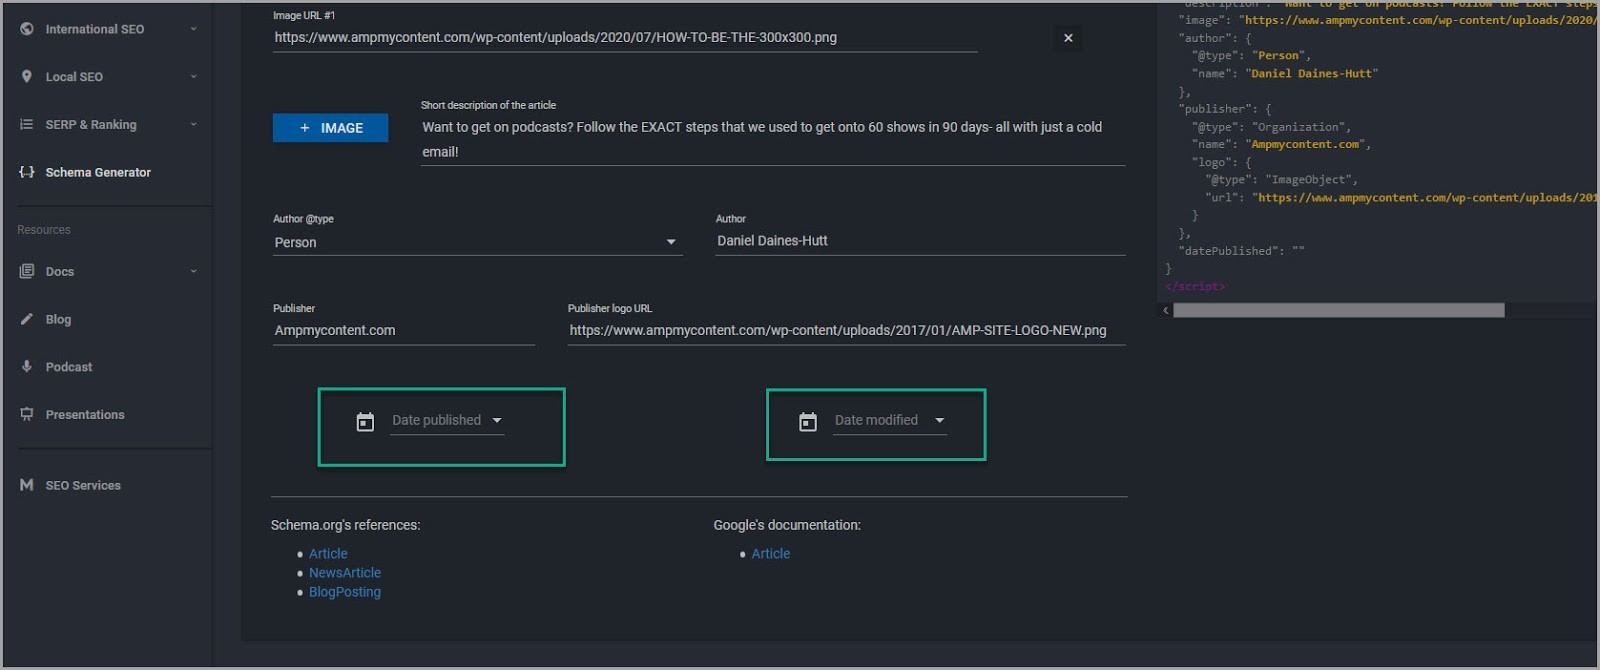
So all we need to do is head back across and fix that, and then test again
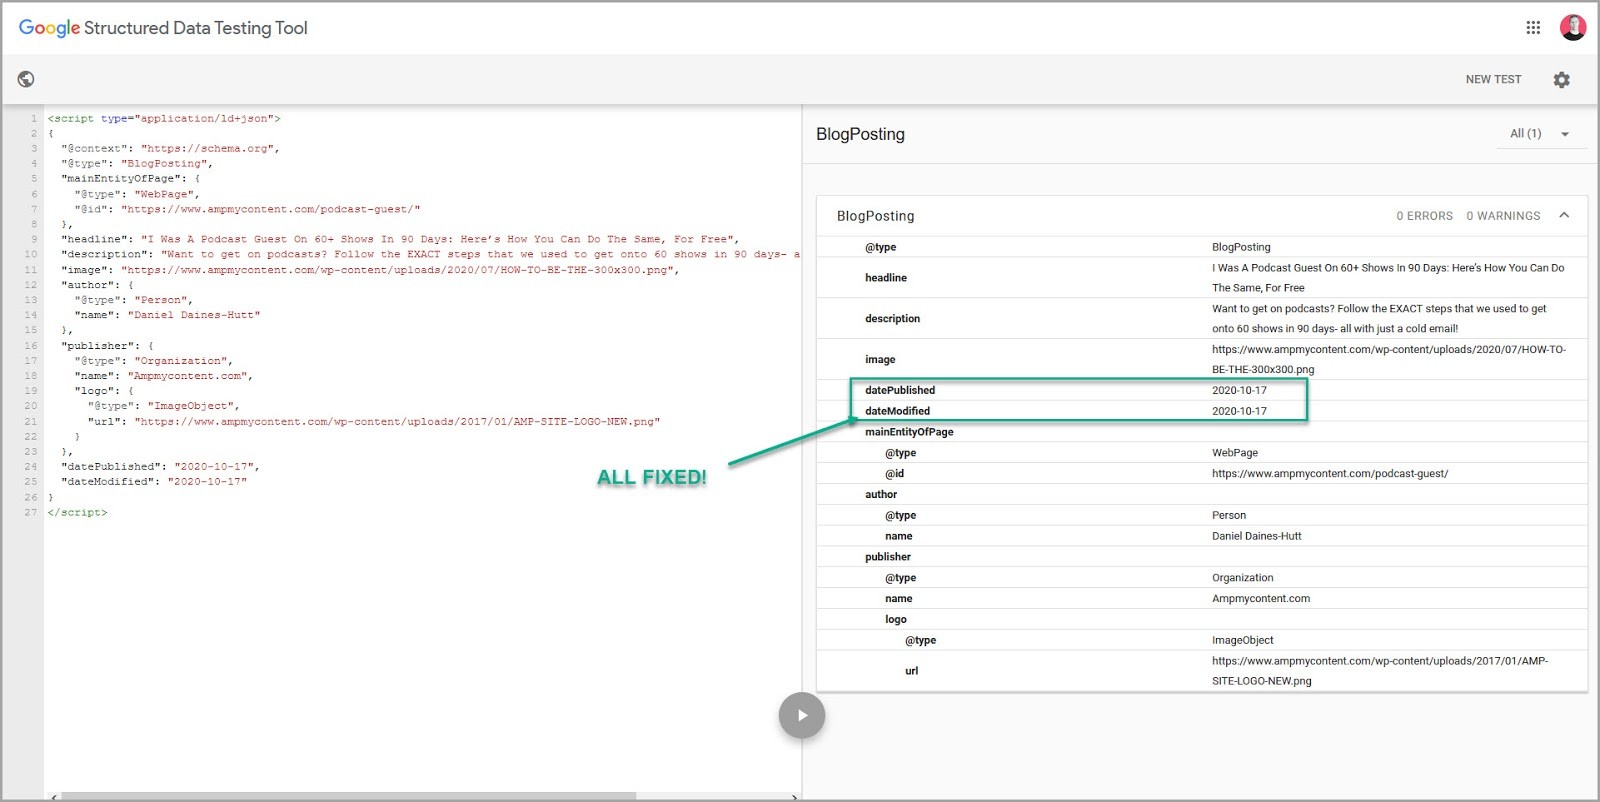
As long as it’s all working head back to Merkle and click on the copy option to copy the code.
(This is next to the text function in the right hand side)
Once you’ve done that, open up notepad and paste the code in so you can use it in a second
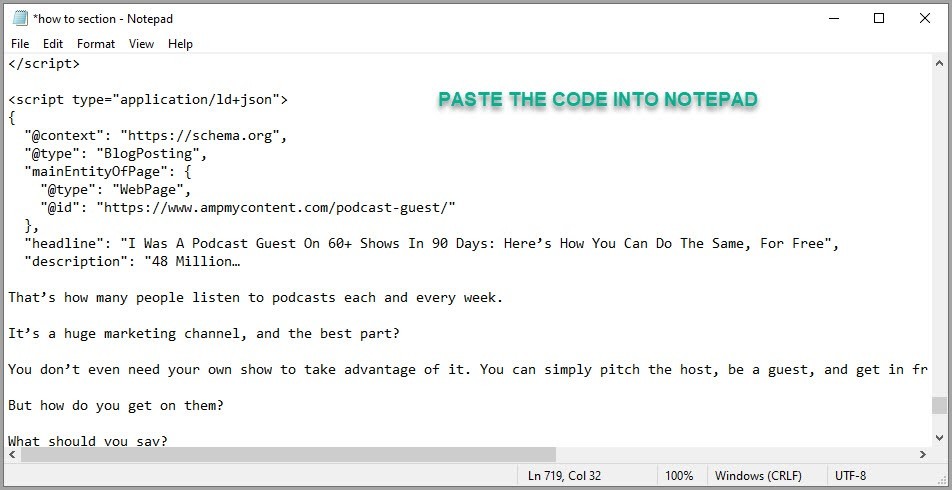
Easy right?
So now let’s markup the FAQ section of the article
(You might not need this for your article, but just so you can see how it’s done)
Load up a new tab with the Merkle tool in.
Why a new tab?
Well the tool doesn’t save the code, so I like to keep a separate tab for each version, just in case there are any errors.
This time you’re going to select FAQ page.
You’ll notice that there are different sections to fill out.
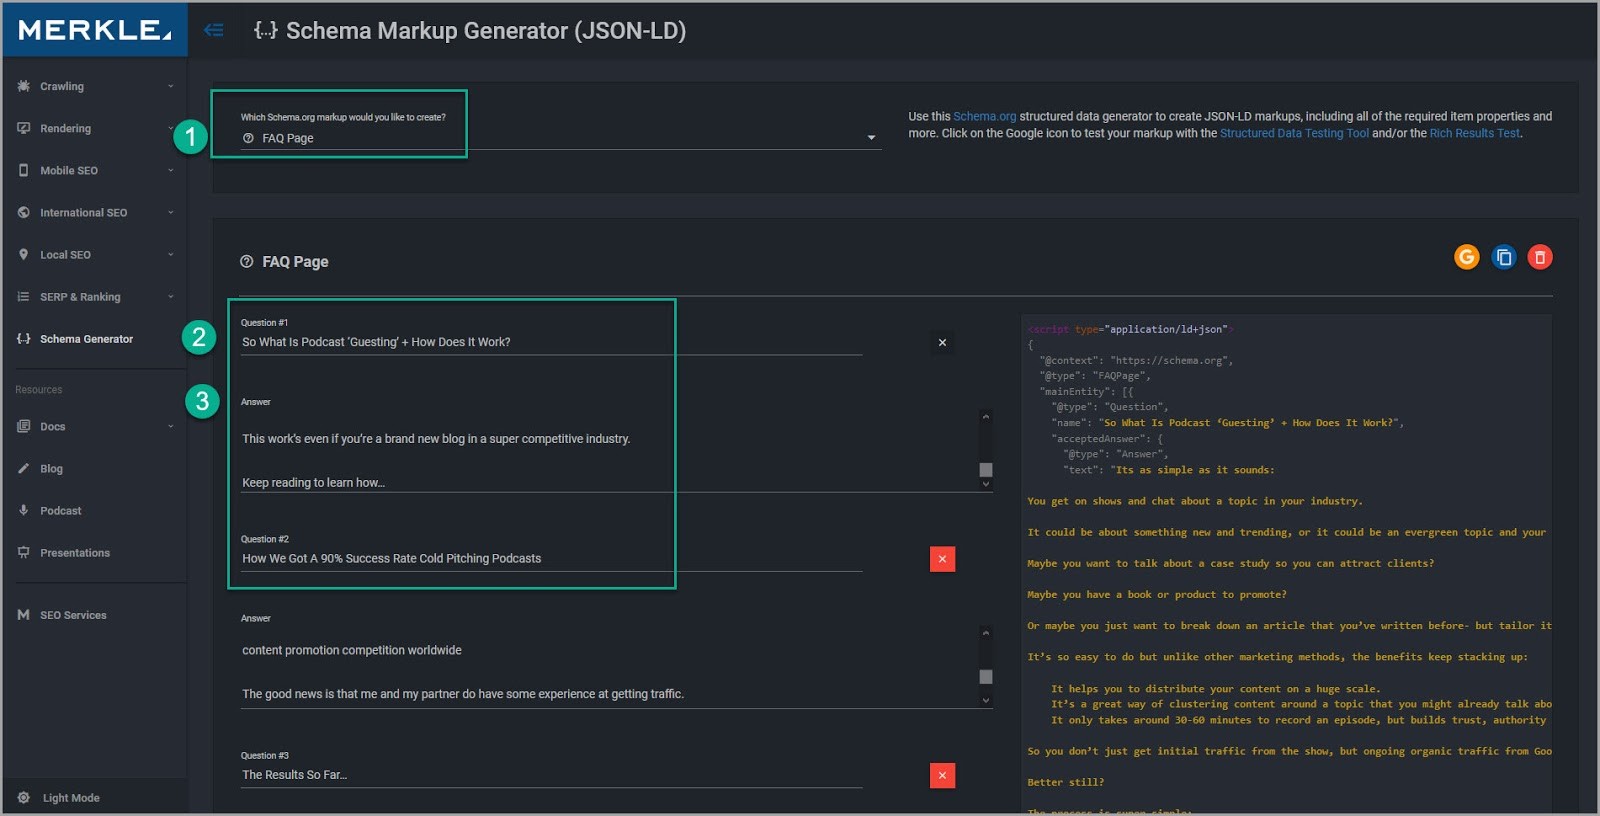
Select the FAQ page option, and then go ahead and fill out any question and answers that ARE IN YOUR article here.
It doesn’t need to be a heap of them, but they do need to be questions that are in your content.
(You can’t just add in random questions as you can be penalized for this).
Once you’ve done that go ahead and test the rich results and structured data just like before, to see if there are any issues.
Side Note:
You can copy and paste the questions and answers from your article. However, just be sure not to paste any emojis as these can have their own hidden code that will cause an error.
(This will often appear as FALSE in your results)
As long as the code is working, copy it and then paste it into the notepad also.
Just make sure to leave a line between them before pasting it in.
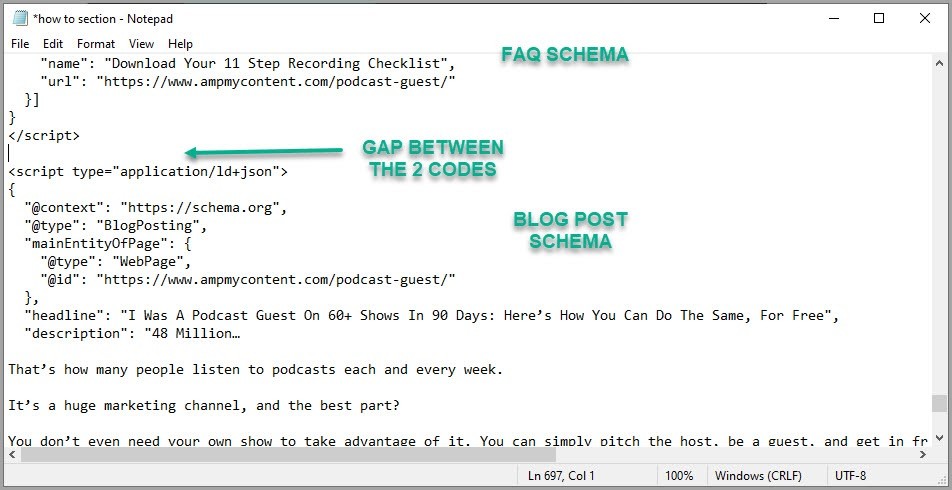
This way you wont get any code errors if they overlap etc
Simple so far right?
Finally, let’s show you how to add the How To Schema.
This one can take a little more time, depending on how many steps are in your article.
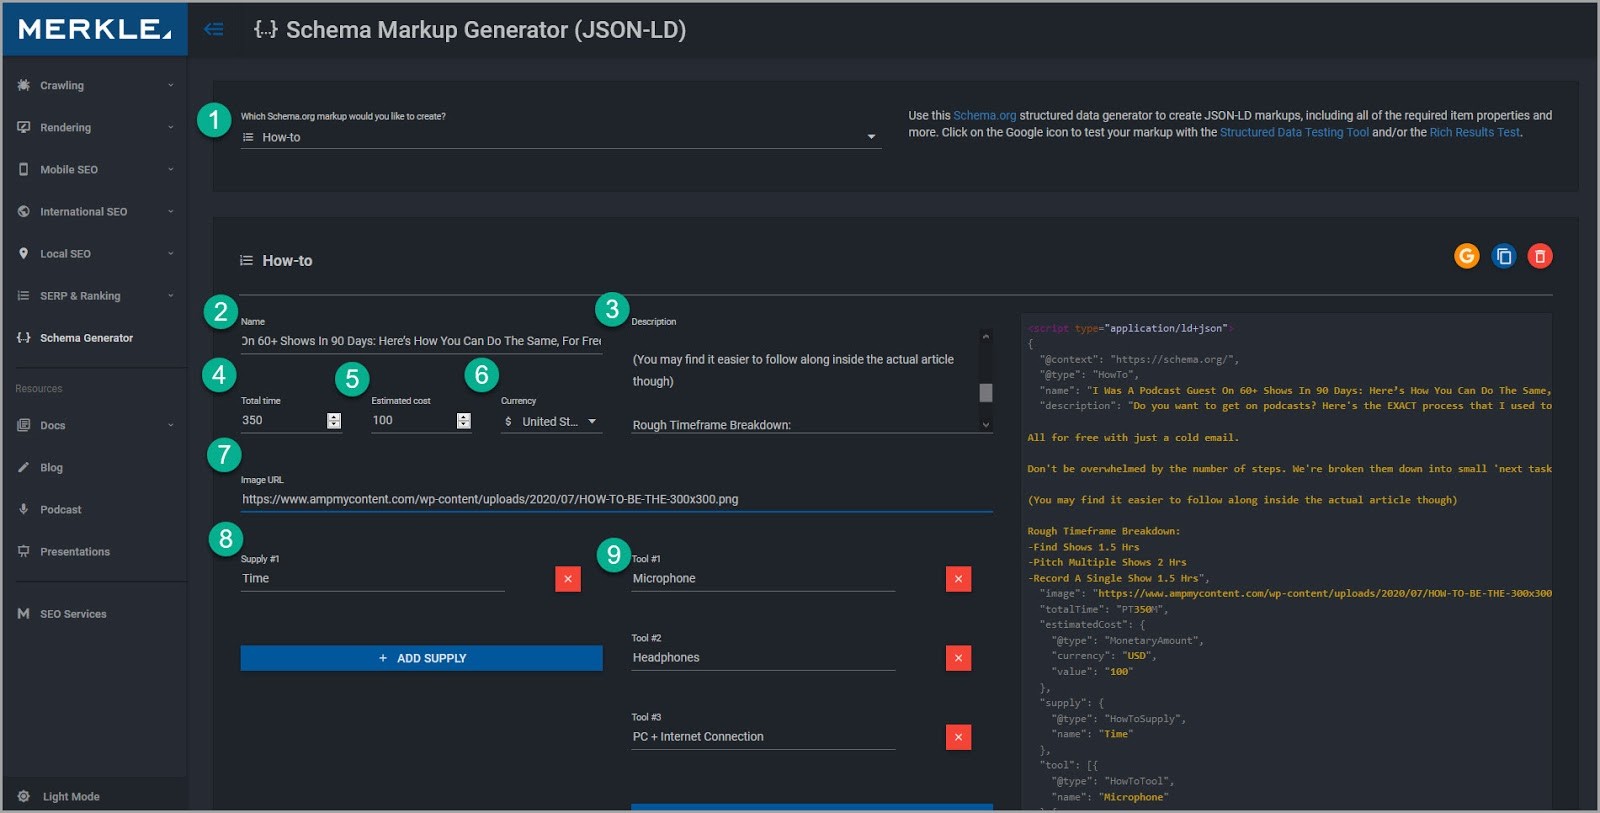
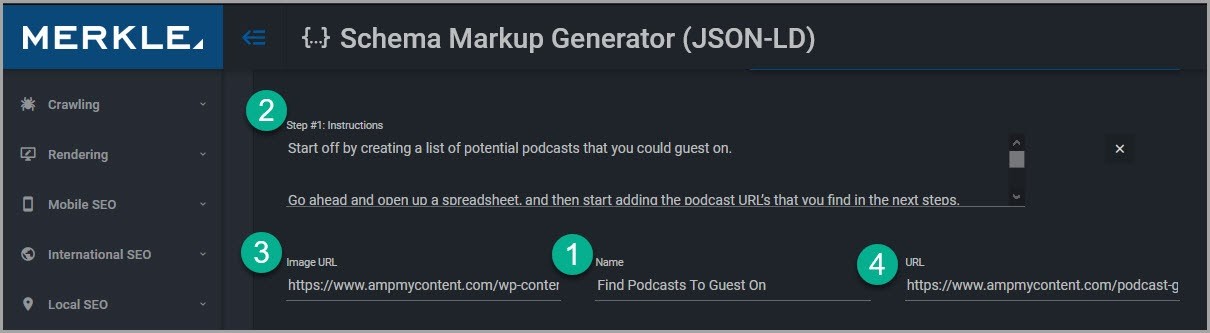
So go ahead and open up another new tab for the Merkle tool, and this time select ‘How To’. Then you’re going to fill in the ‘core information’ about the process first.
(This is the info that shows in the rich snippet above the steps)
Select:
- The How To option.
- Add the article headline.
- Add a brief description.
- Add estimated time to complete.
- Estimated Cost.
- Currency.
- Any supplies needed.
- And tools needed.
Once you’ve done that scroll down the page to the steps section.
There are 4 things that you need to fill out:
- The name of the step.
- The description of what they need to do for that step.
- An image that helps them visualise it.
- And the URL of the page.
If you had jump to sections in your article, then this could be that URL so a click would take them to the right step on your page.
(Personally I just put the article URL.)
Easy right?
Then you simply repeat that for however many steps you have in your article.
I broke my article down into multiple bite sized chunks so we ended up having a fair few steps.
The good news is that any more than 3 steps and the search result will ask if they want to click through and read the whole guide.
So once you’ve finished adding all your steps, go ahead and test the rich results and structured data again.
(If you have any warnings or errors, it’s usually because you copy and pasted an emoji or something with its own code OR you simply didn’t fill out all the information boxes for images etc)
As long as it’s all working ok, copy the code and add it to your notepad.
Now it’s time to add it to your page…
Step #2: Add the Schema Markup to your page.
Now there are a few ways to do this.
Basically we want to insert this code into the header of this specific article only.
If you’re on Wordpress you can grab a plugin called ‘SOGO Add script to Individual Pages Header Footer’
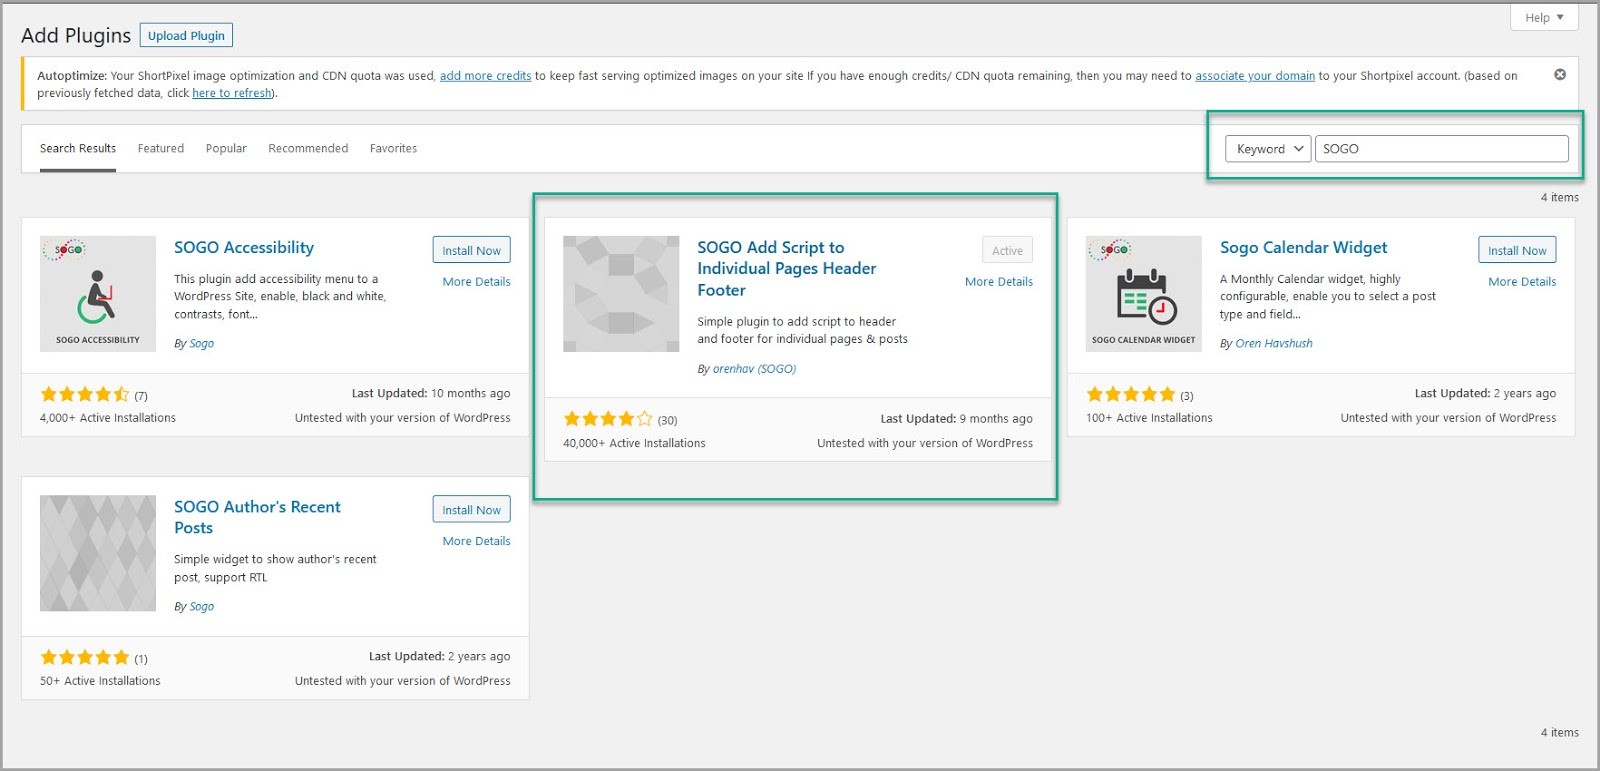
Once it’s installed you’ll see a box at the bottom of your article when you go into your Wordpress editor.
Then you can simply copy the entire code from notepad, paste it in and hit save.
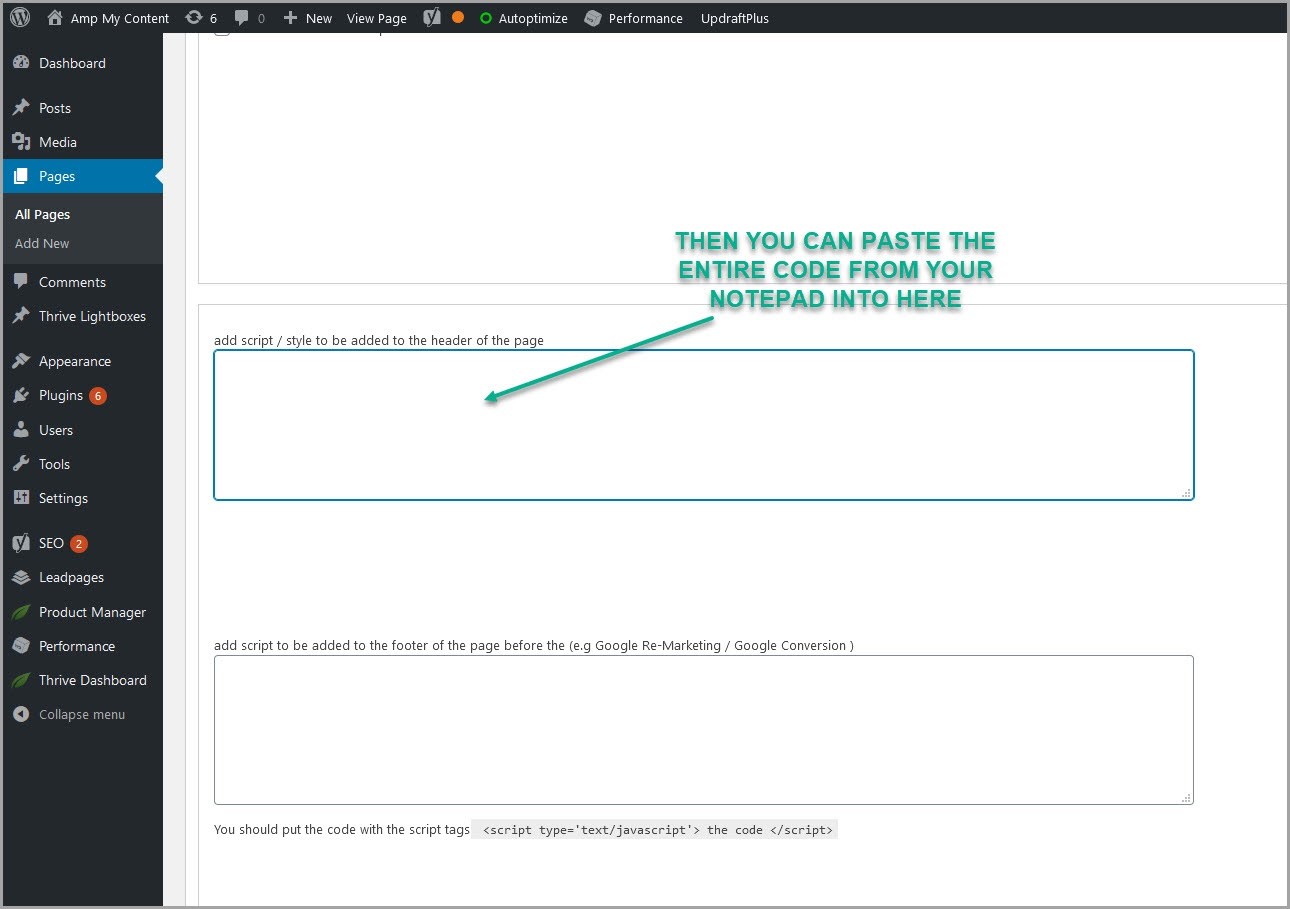
Easy.
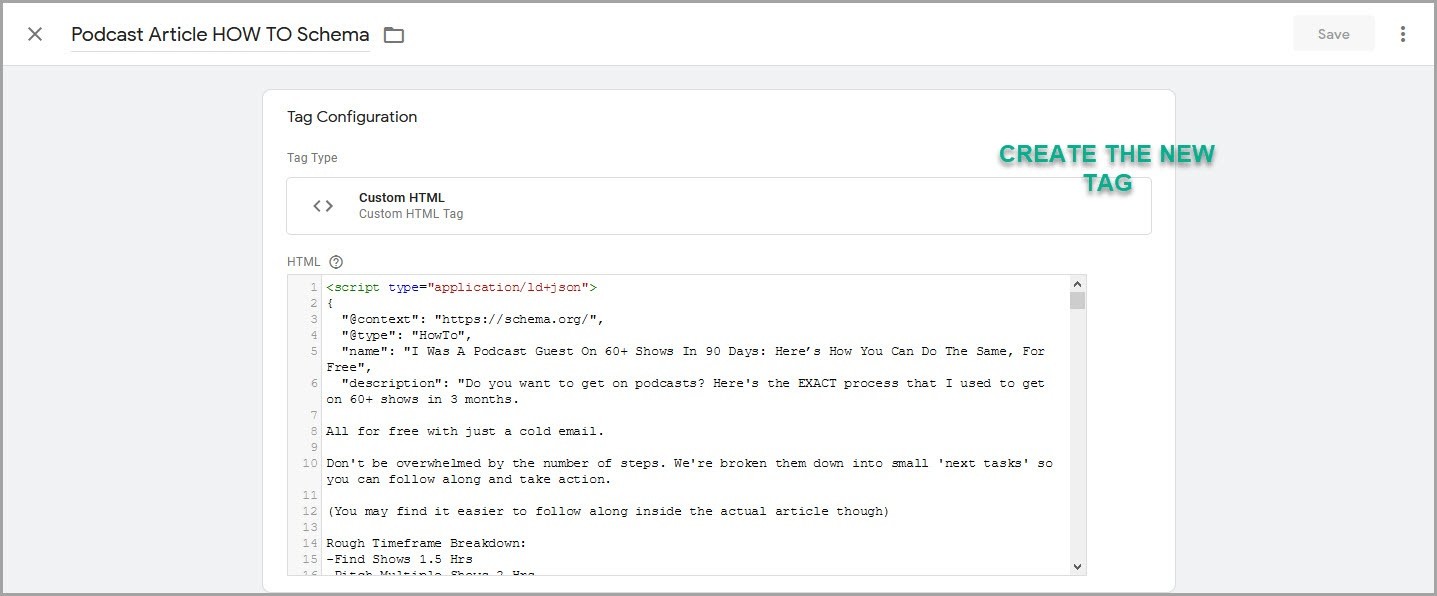
If you’re not on Wordpress or if you’re using Google tag Manager, then you can add it on there instead.
You simply create a new HTML tag and upload your schema code from notepad.
Then you set the trigger event to be when the path equals the URL slug of your page.
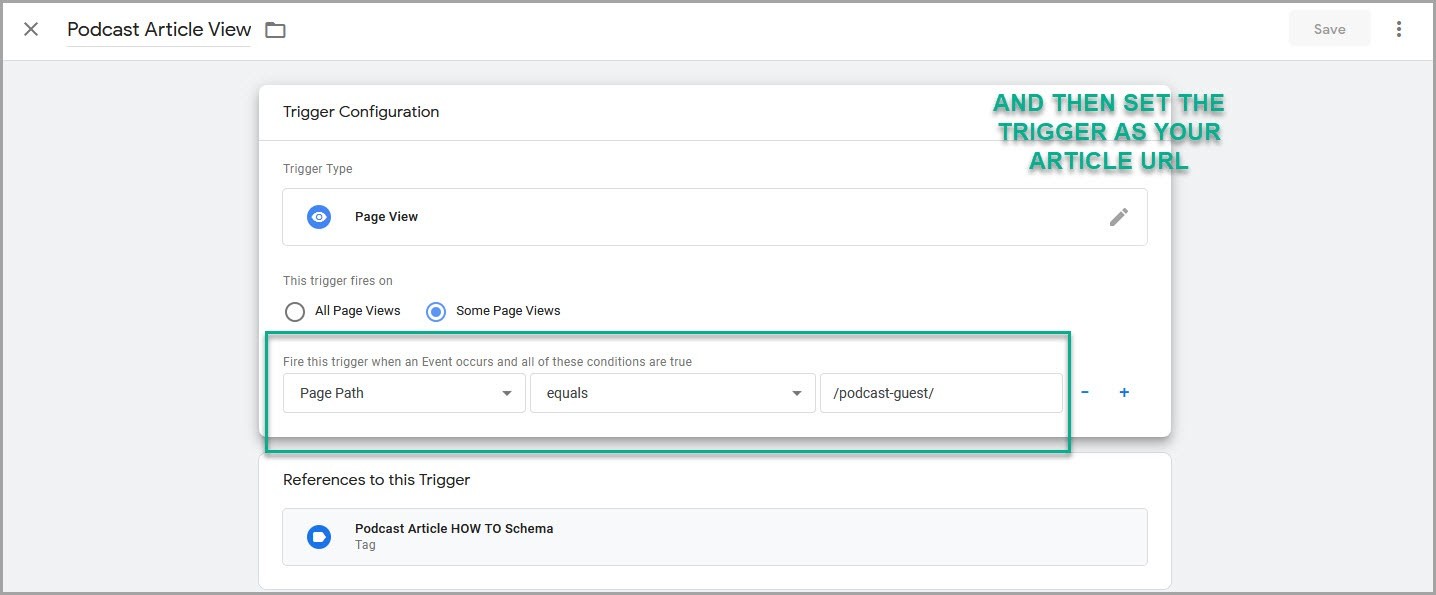
Then you just need to submit the new GTM settings and save it.
Easy!
Now any search engine that finds this page should be able to read your schema markup. but let’s check just in case…
Step #3: Test the code
So far we’ve just been testing the 3 schema codes all on their own.
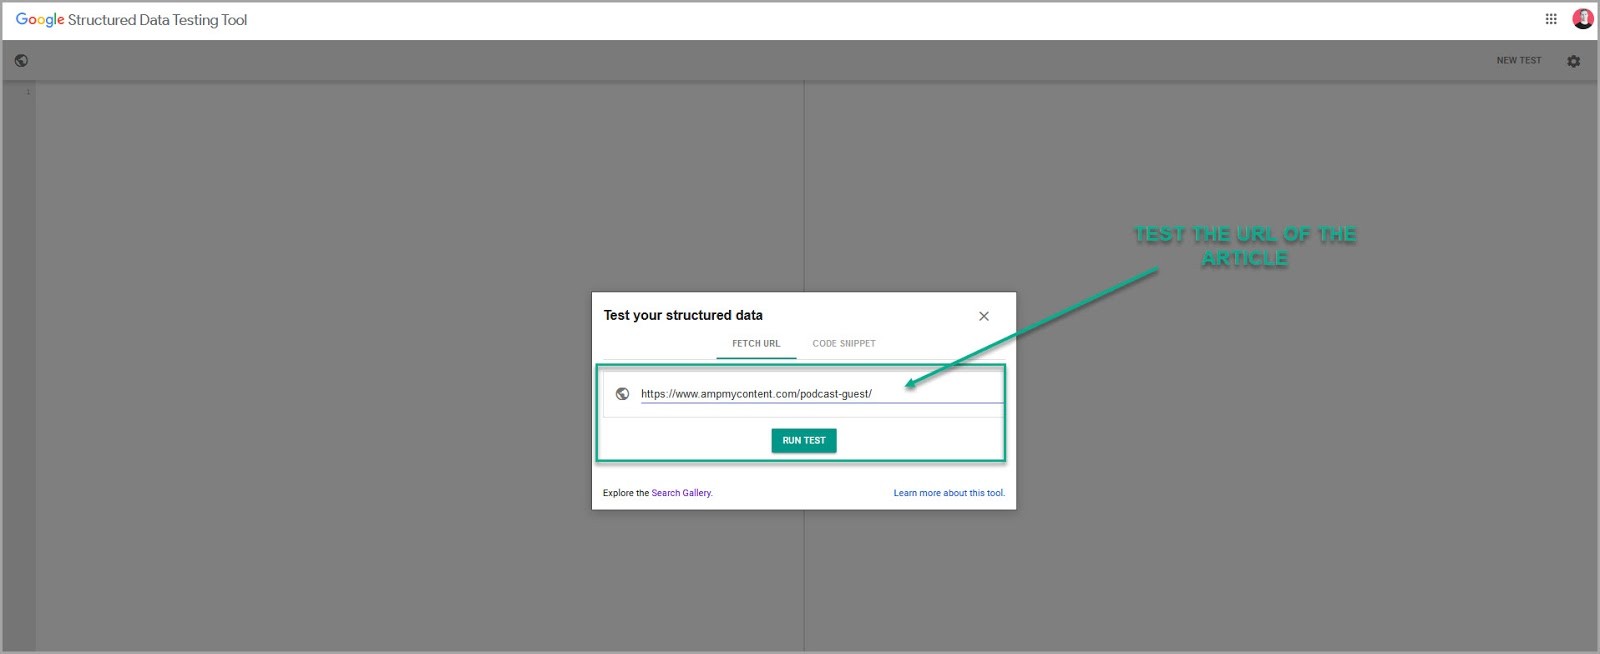
Now we want to test the page itself with all 3 added, so head across to the rich results tester here.
This time you’re going to enter your article URL instead of the raw code.
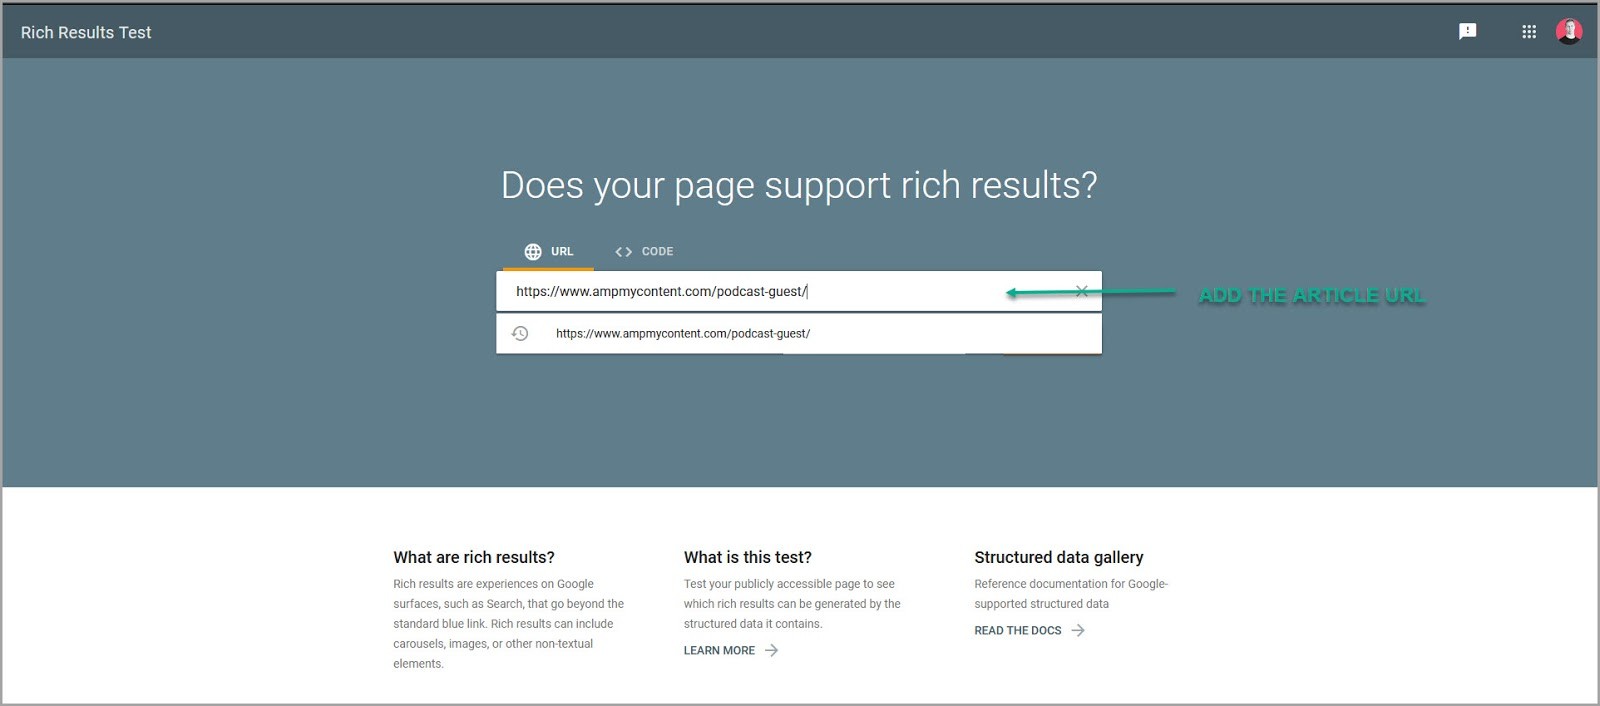
Give it a second to run through and the results will pop up.
(If you have any issues just clear your web cache)
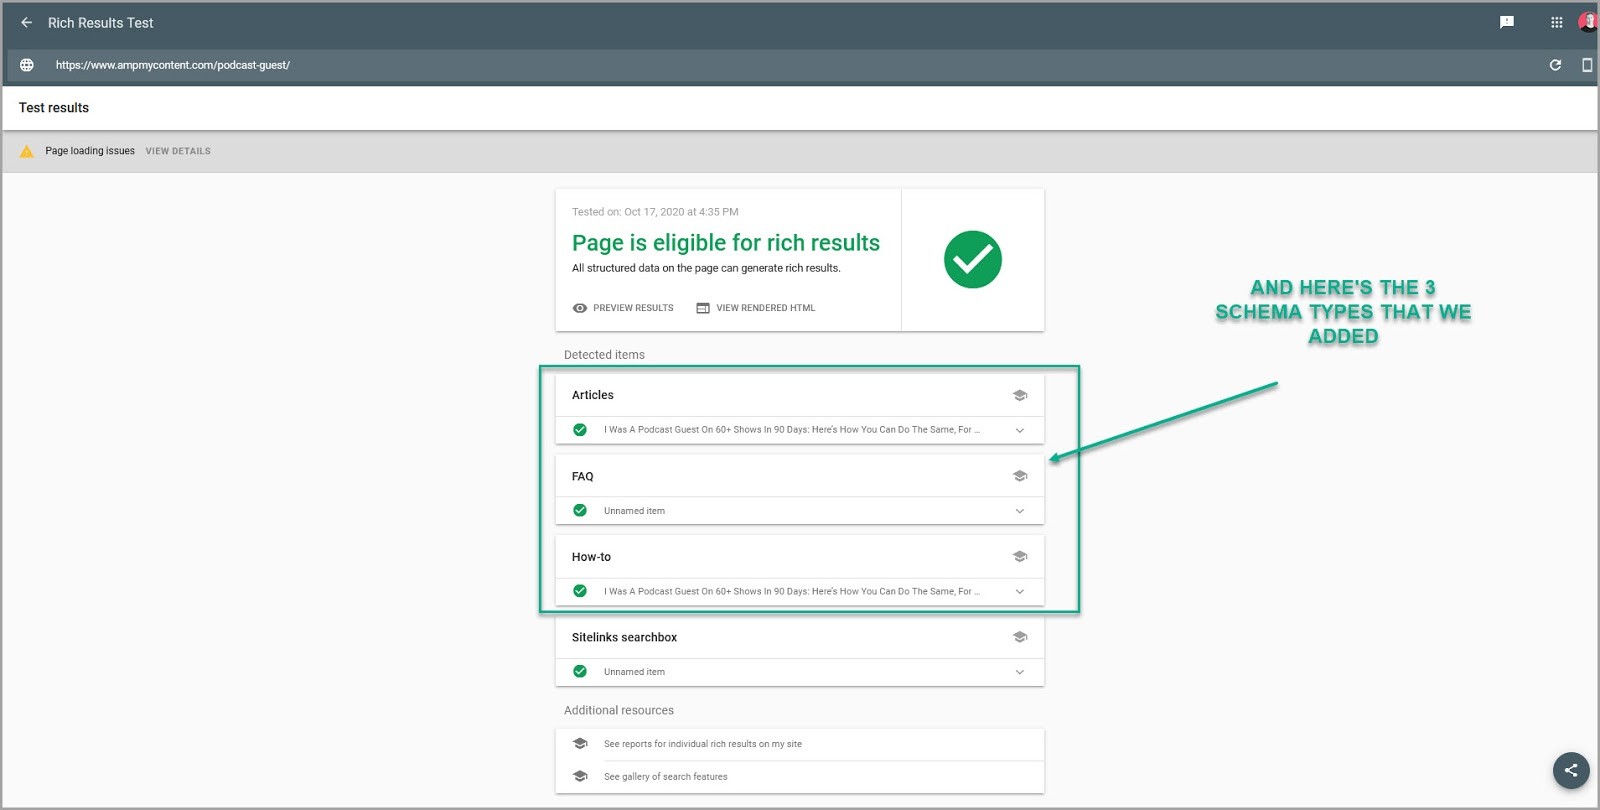
So here you can see that it worked, as we have the 3 schema markups that we added!
Now let’s quickly do the same test on the structured data tool and make sure it all works.
Again we want to test the URL of the page.
Then let it load up.
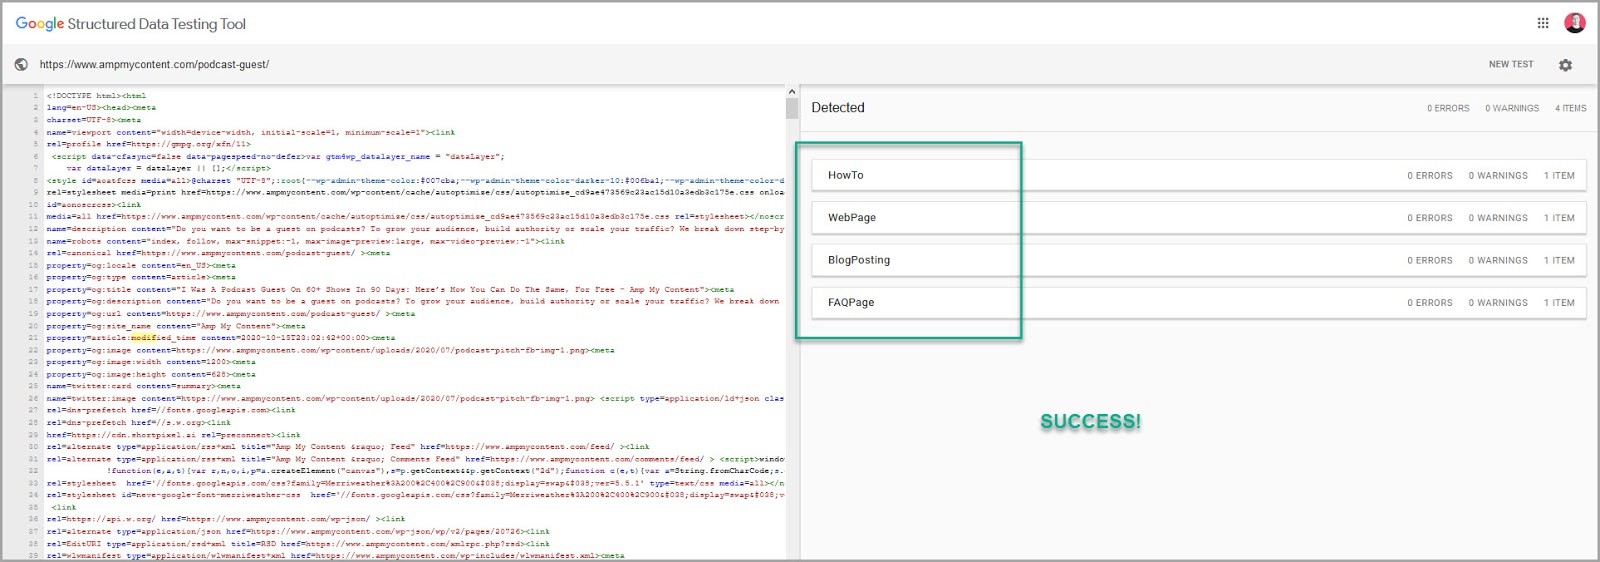
If it works you should see the schema that you added on the right hand side.
So there’s just one final step to take…
Step #4: Get your article re-indexed with your new Schema added.
Head across to your Google search console and click across to URL inspection
Then go ahead and add the URL of your article and click on ‘test for live version’
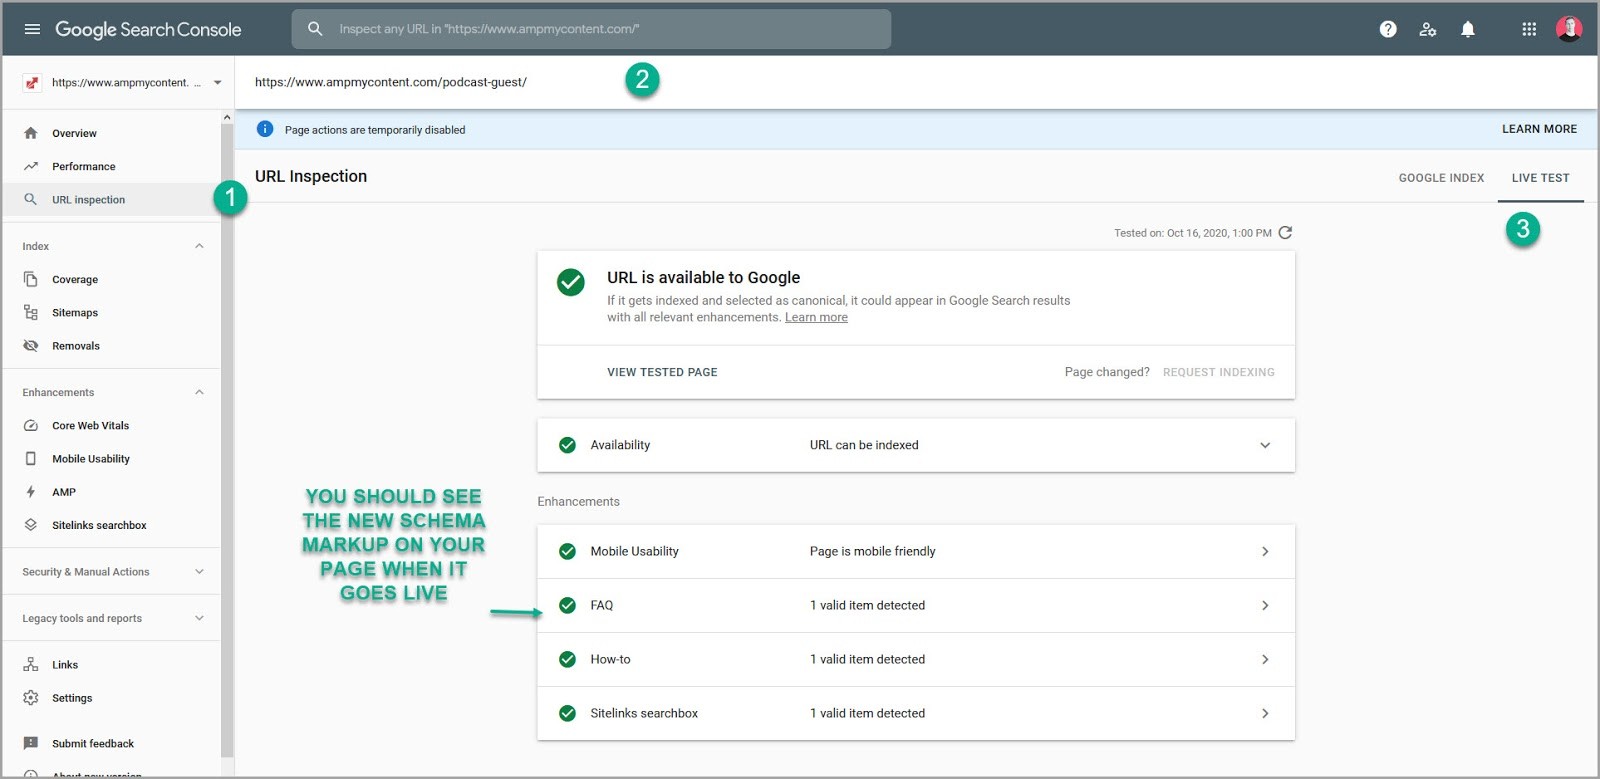
You should be able to see the new schema markup ‘enhancements’ appear on the page.
Once that’s done, click on ‘request indexing’ and your new data will be added to google’s index for your page.
And if you’re on page #1?
Well then you might see yourself in the snippets in as little as an hour!
Conclusion
So there you have it. A walk through guide to help you not only understand the benefits of Schema markup, but we’ve also covered how to add this in your own content.
All that’s left to do now is add it to your own articles!
About the Author
Daniel Daines-Hutt is the co-founder of Ampmycontent. A blog that shares in depth guides and case studies around content promotion.
If you want to learn more about organic or paid traffic techniques, then we have guides for you.